


The economy is in the tank and now you are spending a heck of a lot more time at home to save some cash. If you are going to be on a self-imposed house arrest, you might as well spruce up the place a bit. So today, we are going to do a little decorating DIY on a tiny budget.
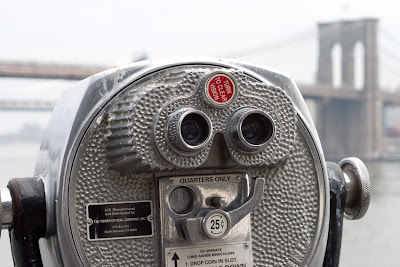
In design, you can make bold impacts in many different ways - repetition, color, scale, etc. Today we're going to focus on scale. This is a sample of a piece of artwork that I created for my cosmopolitan crib, using a picture that I took of the street sign on our block:

1. Take a day to wander around your neighborhood or city, snapping detail shots of things that you love. It could be architecture, nature, furniture - whatever inspires you. **Note: most digital cameras have settings that allow you to choose higher resolution images. You will need to shoot the highest quality that you can.
2. Choose your favorite image.
3. Measure the portion of the wall that you want to work with so that you have a range of where you want the overall size to hit.
5. Format the first presentation size so that it is the overall size that you want the picture to be (minus a couple of inches for the gaps between sections). Mine is 36"x36".
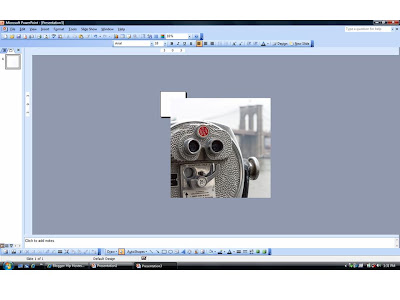
6. Insert the image into the large presentation. Resize it so that it fills the entire presentation area, you may have to crop the image a bit to make it fit eactly. Save. 7. Now, open the second presentation and format the size so that it equals the module of each section of the overall picture. Keep the module under whatever size sheet of paper you can print on your printer. In my case, I would do 9" x9" sections, because my Kinkos can print on 11x17 sheets of paper at no upcharge.
8. Go to Presentation #1 and copy the image. Go to Presentation # 2 and paste the image. DO NOT RESIZE the image. You may have to adjust the zoom so that you can see the entire screen best.
 9. Move the image so that the upper left corner of the image lines up with the upper left corner of the presentation frame. Crop everything that doesn't fit into this box out of the picture.
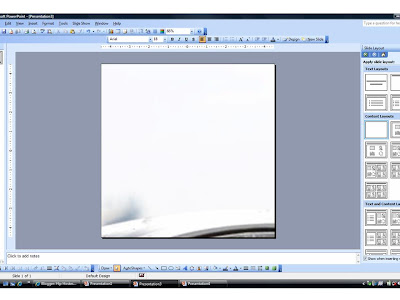
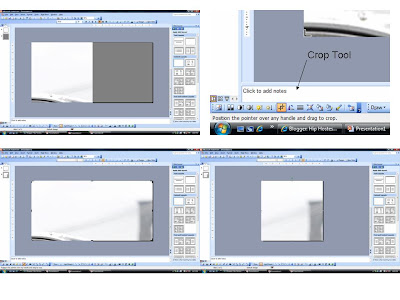
10. Now open a duplicate slide. Shift the image to the left so that the upper right corner of the image lines up with the upper left corner of the frame (I made the frame gray so that you could best see this). Using your crop tool, uncrop the right side of the image by dragging it across to the right side of the frame. You then go back to the left side of the image and use the crop tool to drag it to the left side of the frame. This will leave you with the second horizontal section.
 11. Using this theory, repeat step #10 until you have a Powerpoint presentation that contains 1 slide for each section of your artwork. If you lose track of where you are in the overall picture, you can always refer back to Presentation #1 where you have it cropped and saved.
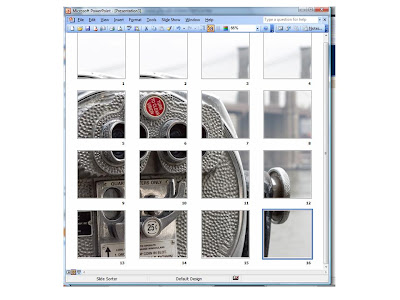 12. Print Presentation #2.
NOTES:
In my apartment, I framed each section using record album frames. It isn't necessary if you are trying to keep to a strict budget, but it is an option.
When cutting the foam core, it is extremely important that you use a sharp blade. No need for a fancy cutting tool: just an Exacto knife, a metal straight edge, and a cutting board will suffice. Cut towards you, not away. You will have more control that way. Let the blade do the work for you - don't push down too hard. It should take 3 or 4 passes over a side to cut through. And you might need to change your blade once in between all of the cutting to keep it sufficiently sharp.

6 comments:
Love this DIY project! Your art looks fantastic... what a great way to inject personality into a living space for cheap.
This is genius!! And so detail oriented. (Thx for doing it in powerpoint as opposed to having to buy some expensive graphic layout package like quark which most ppl don't know how to use.) You should submit this to LifeHacker. GENIUS!
Genius... ok I don't get the 9x9" vs 11x17" at kinkos bit. Do you mean u pay the same at kinkos for 8.5x11 or 11x17, thus you're going to print 9x9 images on 11x17 paper and then cut the big white borders off? Genius...
Sorry to confuse you on that. Yes, you are correct. No matter what module you choose, you are more than likely going to trim off excess (unless you can make 8.5x11 work). Kinkos and other print houses usually charge one standard fee for letter, legal, and 11x17 sheets. Anything bigger or off of the norm, could incur an upcharge...and who needs that? You just trim off the excess and keep the price down. Thanks for asking!
this is awesome. i understand how you divide the photo into the smaller photos moving across the photo (horizontally) but once you get to the end of the top row how do you move down?
Post a Comment