Showing posts with label DIY. Show all posts

Friday, June 13, 2014

Planter Makeovers

I think a big reason that I've never really been into plants is because it's so difficult to find a decent planter.  First of all there is not a lot out there and just regular run of the mill pots are by no means inexpensive.  That is why this tutorial from The Sweet Escape really caught my eye.  Check out what she does to cheap planters to take them from dull to chic.

Before
After

Wednesday, May 21, 2014

Feeling Crafty?

The weather in NYC this weekend is looking kinda rainy at this point.  So, I thought it might be a good idea to have a couple of fun ideas up your sleeve.  Check out these cute projects.

Merry Thought
This hanging table is super cute.


Kristi Murphy
Painting your bathroom is not the only update you can do.


Nalle's House
In need of some new artwork?


Henry Happened
Pina Colada scrub mask...smells like coconuts and prepares your skin for tanning!


Thursday, May 15, 2014

Mod Podge

To Mod Podge or not to Mod Podge...that is the question I ask thee.  I have never embraced this trend it may because the name kinda bothers me and I never fancied myself saying I'm a  Mod-Podger. Can  you imagine your cell phone rings and someone is like, "Hey, you wanna grab brunch?" and then your like, "No, I'm just going to stay at home and Mod Podge."   Uh-huh...what did you think just then?

BUT then I ran across this and I gotta say I was a little intrigued.  Probably has more to do with the great trays and the bohemian paper but it got me thinking.  Could I secretly want to Mod Podge?

These trays that could easily be picked up for dollars.


Plus this cool wrapping paper they picked up at World Market


Equals these fabulous serving trays?


Wednesday, March 12, 2014

Apple Tastic

Someone deserves a big pat on the back and yes...it's me.  I accomplished my DIY goal for March.  I've loved the look of the above golden apple candle for some time now but spending $150 on this was never something I could justify.  So, imagine my surprise when I saw these little beauties at an estate sale for $2.50 (they came in a pair).  Plus the look on my sister's face when I got excited and picked them up was priceless.


Now, for the DIY'ing magic.  These had about 10 years of different colors of candles melted in them, so I put the oven on 200 and turned them upside down on a cookie sheet covered with foil. After about 10 minutes all the wax just melted away.  I then purchased 2 cans of spray paint in metallic gold and gloss white.  Then my husband had some vinyl electrical tape which I used to put around the lip of the where the lid fits so I wouldn't get to many layers of paint there to prevent the lid from sitting flush.
I wanted some difference in color, so I painted 1 gold outside with a white inside and vice a versa.  It took a couple hours to get about 3-4 coats on evenly.  Now, I realize it is not AS cool as the inspiration but it cost a total of $12.50 for 2 and still looks pretty chic.


Wednesday, March 5, 2014

Crafty Wednesday

These spheres add a nice sculptural element to decor and believe it or not it can be done with a couple embroidery hoops.  Who knew?  If you have a bunch of blank bookshelves staring you in the face then this would add the perfect touch and for just a few dollars.

Wednesday, February 26, 2014

Boudoir Lamp Revamp

I've recently started to attend estate sales.  It's a little wacky...people wise, adrenaline inducing, and I feel a little odd pilfering other people's stuff.  However, I never expected to love the heart racing feeling as they open the doors and everyone tears in like they are on an episode of The Grocery Game.  My main interest is Mid Century Modern which is coincidentally most other people's as well...so game on.

Let's start by saying that I've never owned or purchased, let alone refurbished, something that is 80 years old.  But I saw a little Boudoir lamp on a dusty shelf that had a combo of a milk glass base and a hobnail body that I couldn't resist.  I suspect at one point it also had a hobnail lamp shade that somehow met an unfortunate incident. 

This post is about the journey of a lovely little lamp that cost me $3 and started its life somewhere between the 1920's and 30's according to the fact that it had a cloth cord.  Also, almost everything in the house was from the same era...I'm quick like that.

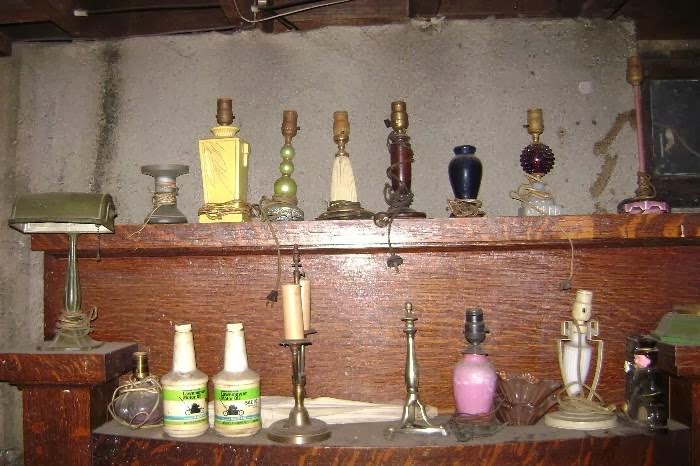
This is what the shelf looked like where I grabbed it from.  I also wanted that green lamp and desk lamp but both were snatched moments before I could get to them.  I'm telling you this is no joke.


When we plugged it in, suprisingly it still worked, but wouldn't be safe due to the frayed cloth cord.  So my husband took it apart piece by piece in about 3 minutes.

After some intense cleaning we purchased a new socket set and electrical cord from Home Depot.  We also painted those three rings you see at the top with brass spray paint due to the fact they were so rusty they wouldn't clean up nicely.  Then reassembly began using tips from this video (http://www.youtube.com/watch?v=cNcUst55t5s) and about 10 minutes and a few curse words later my husband had it reassembled. It really sounds like rewiring a lamp would be a major undertaking but it was actually quite easy!


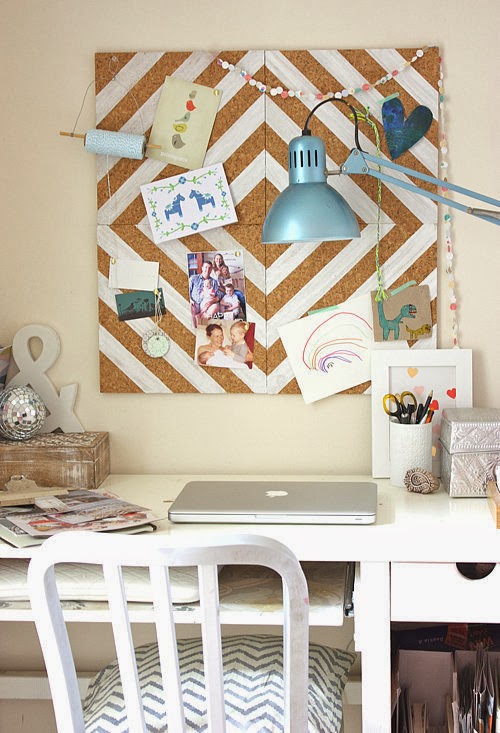
I purchased a new lamp shade and with all the parts we spent about $30.  But it was a very gratifying project and now we have a little piece of history on our bedside table.


Monday, January 27, 2014

Office Makeover

It's a new year and I'm thinking of adding some fun touches to the home office for inspiration.  Here is a few ideas that I found intriguing.

I like the idea of adding some sort of inspiration board but I want it to be small.  I would like to change it up weekly or even daily if possible.  I like these clothespins by bright bazaar.

I like the idea of fun cord camouflage.
Metallic Mouse Pad
Patterned Cork Board.
I would love to hear your ideas.


Friday, January 24, 2014

Sanding Sugar

Want to make an easy way to distinguish who's rooting for who?  How about offering opposing team colors of sanding sugar to rim everyone's glass.  You could also use salt if that is more appropriate for the drinks you are offering.  It would a great conversation starter for people who have never met and let's face it the party would look pretty cool.  


Wednesday, January 22, 2014

DIY: Antler Towel Rack

Anyone who has been to a flea market with me or a swanky housewares store knows that I always marvel at the horns.  I think this is actually in my DNA since my dad was an avid collector.  That being said, I'm not sure he would approve of my style but a horn's a horn right.  His style was definitely more eccentric in a red velvet kinda way.

The main reason I have never made the purchase up to this point is because I couldn't get a clear vision of where those suckers could go.  I tend to like the metallic, neon or even girly flower variety and I don't think the hubby shares my excitement.  So, hanging it in our living room was probably going to be an issue.

But this little DIY was actually written for me.  Even though I don't know you Liz Marie...I feel we are kindreds.  If you are ever in NYC, the cocktails are on me.   Thank you.


Wednesday, January 15, 2014

Jewelry Blocks

If one of your resolutions is to get organized and you have a pile of jewelry then this DIY is for you. Check out these step by step instructions from Emily Henderson on how to be more organized and chic at the same time.  I love the finished product!


Monday, December 16, 2013

What a holiday cake!

Look at those cute little trees on top of that cake.  I think this is adorable and the perfect holiday dessert.  Freutcake gives a step by step tutorial on the whole cake.  However, I like the fact that if you don't have any time or frankly any cake pans (thinking of small NY apartments) you could buy the cake from a bakery and just add your personal touch.  I love a great "wow" factor with minimal work.

Wednesday, December 11, 2013

Simple White Stockings

I fell in love with these white stockings from Jones Design Company.  They look so chic hanging over the fireplace and I love the idea of changing out the embellishments each year for a different look.  She even says it is cheaper than making your own...wow!  Check it out here

.

Wednesday, December 4, 2013

DIY: Sequined Swizzle Sticks

These sequined swizzle sticks are the perfect thing to kick up any party a notch.  I love the color combo shown here which is perfect for New Years Eve.  But you could also do red and green for the holidays.  Any chance to play with sequins is a winner.  Thanks for the great idea Alyssa and Carla.


Thursday, November 14, 2013

Thanksgiving Crafts

You know every year I say the same thing, if you're going to have a lot of kids at your Thanksgiving dinner then have a project for them.  I love the idea of the older kids or a designated adult helping the younger ones with an organized craft of some kind.

This year, I saw this cute fingerprint Christmas bulb wrapping paper and I knew I had found a winner.  How cute, for each child to have signature wrapping paper...that is so Suri.  The big kids can draw on the wires and put each child's name on their in cute lettering and then let the fun begin.  I think I would go with brown paper, just cause it is easier to find and a little more affordable.  This will allow you to give thanks for 1 hour of crafting peace and quiet.


Wednesday, October 23, 2013

Healthy Trick or Treats

If you have been invited to a Halloween party where sweet treats are prohibited then how about these cute juice box wraps.  They add a special touch to an already loved favorite.

Wednesday, October 16, 2013

Monster Teeth

If you have a children's Halloween gathering of some sort in your future then this post is for you.  This DIY complete with free download from eat.sleep.make could make your life easy and give you a great treat for the kiddos. I especially like the idea of being able to do this project ahead of time so that your schedule is free for pumpkin picking and Halloween decorating.


Thursday, October 3, 2013

Homemade Apple Cider Sticks

You've heard of hot chocolate on a stick but have you heard of apple cider sticks?  Check out this cute idea from Crafts Unleashed.  You could definitely be a hit at your next football game or pumpkin picking party.

Wednesday, September 25, 2013

Halloween Decor on the Cheap

Halloween is fast approaching.  Check out this cute DIY spooky vase from The Centsible Life.  It's a great reason to drink a Starbucks Frappuccino and then add a little silver spray paint.  If you are having difficulty finding some kind of scary bauble to hang, you could also print out some scary clip art on a 2" circle.  This could be an inexpensive way to decorate every corner of your home for your upcoming soiree.  Also, the spider mums look fantastic.


Friday, September 13, 2013

Confetti Balloons

I've been pretty vocal about not really loving balloons for parties except maybe kid's parties.  However, that was before I saw how cool they looked confetti dipped.  Check out the genius of Studio DIY for a complete tutorial on how you to can make the coolest balloons around.


Friday, September 6, 2013

Dollar Store Sorcery


hip hostess uses alot of trays and anything this cute that I can buy and make myself for a few dollars...I'm in. Check out the step by step using a pretty hideous buy from the dollar store.  Way to go tried and true.